Installation of Solar Lights A Guide
Installation of solar lights is a fantastic way to enhance your outdoor space while saving money and reducing your environmental impact. These lights harness the power of the sun, providing energy-efficient illumination for paths, gardens, and patios. They come in various styles, from subtle path lights to bright spotlights, each designed for a specific application.
This guide walks you through the entire process, from initial planning and preparation to final installation, maintenance, and troubleshooting. We’ll cover the different types of solar lights available, comparing their features, benefits, and drawbacks. You’ll learn how to assess your site, choose the perfect placement, and install the lights safely and effectively. Understanding the costs, environmental impact, and aesthetic considerations will help you make informed choices for your project.
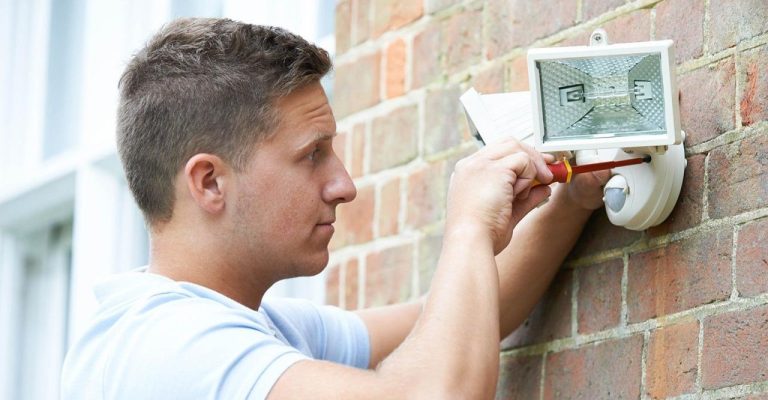
Introduction to Solar Lights Installation
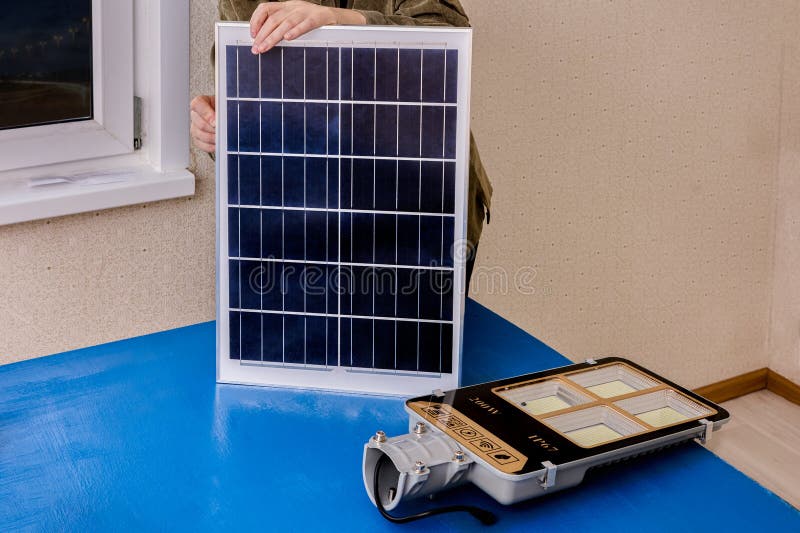
Source: dreamstime.com
Solar-powered outdoor lighting is becoming increasingly popular due to its numerous advantages. These lights harness the power of the sun to illuminate pathways, gardens, and other outdoor spaces, offering a sustainable and cost-effective alternative to traditional electric lighting. Their reliance on sunlight makes them environmentally friendly and contributes to energy conservation.
Solar lights provide a significant financial benefit, reducing electricity bills and lowering the carbon footprint associated with energy consumption. Furthermore, their low maintenance requirements make them a practical choice for homeowners and businesses.
Types of Solar Lights
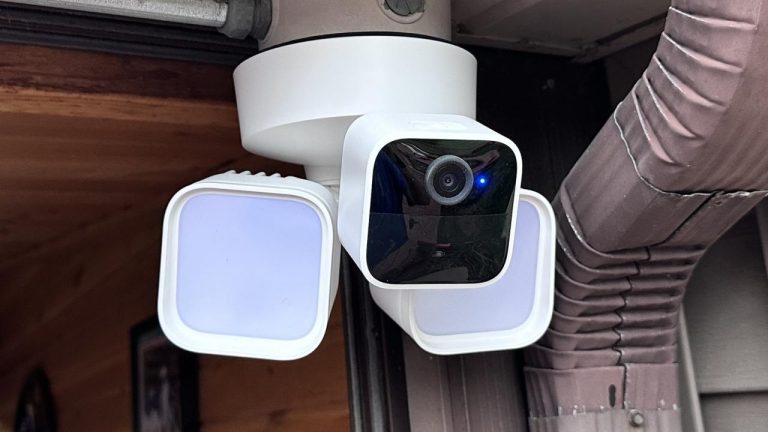
Solar lights come in various styles, each designed for specific applications. Understanding the different types can help homeowners choose the most suitable option for their needs. The diverse range includes spotlights, path lights, and floodlights, each with unique characteristics.
Solar Light Type Comparison
The table below compares different types of solar lights, highlighting their applications, brightness, and durability.
| Feature | Spotlight | Path Light | Floodlight |
|---|---|---|---|
| Application | Accent lighting, highlighting architectural features or specific plants. | Guiding paths, walkways, and driveways. | Wide-area illumination, suitable for large yards or outdoor spaces. |
| Brightness | High, providing focused illumination. | Medium, offering adequate visibility for navigating pathways. | Very High, offering widespread illumination over a significant area. |
| Durability | High, often constructed from robust materials for prolonged use. | Medium, generally suitable for moderate weather conditions. | High, built to withstand harsh weather elements, often including weatherproof housing. |
A spotlight, for example, is ideal for illuminating a specific area, like a garden statue or a pathway corner. Path lights, with their medium brightness, are perfect for guiding foot traffic along walkways. Floodlights, with their high brightness, are best for illuminating larger outdoor spaces, such as patios or yards. Choosing the right type ensures the desired level of illumination and functionality.
Planning and Preparation
A thorough planning phase is crucial for a successful solar light installation. Careful consideration of the site and its characteristics ensures optimal performance and longevity of the system. This involves assessing the location, selecting appropriate fixtures, and preparing the installation area. Proper planning minimizes potential issues and maximizes the aesthetic appeal of the finished product.
Site Assessment Importance, Installation of Solar Lights
A thorough site assessment is vital for ensuring the solar lights are correctly positioned for maximum sunlight exposure and efficient energy collection. This evaluation helps determine the best placement to maximize light output and minimize maintenance requirements. Insufficient sunlight exposure directly impacts the performance of the solar lights, reducing their effectiveness and potentially requiring additional lighting solutions.
Location Selection Factors
Several factors influence the ideal location for solar lights. Sunlight exposure is paramount, as solar lights rely on direct sunlight for energy generation. The amount and duration of sunlight hours directly correlate to the duration of the light’s operation. Terrain also plays a critical role. A flat, level area offers the easiest installation and ensures the stability of the solar fixtures. Obstructions like trees or buildings can significantly reduce the sunlight reaching the solar panels, impacting the light’s performance. Consider proximity to electrical outlets for ease of future maintenance or troubleshooting. The desired aesthetic and overall landscaping design should also guide the location choice.
Installation Area Measurement and Marking
Precise measurement and marking are essential for accurate placement of the solar lights. This process involves using measuring tools like tapes and levels to determine the precise coordinates for the fixtures. First, establish the desired placement of the solar light. Then, use a measuring tape to accurately mark the location of the fixture’s base. Use a level to ensure the base is positioned horizontally. Subsequently, mark the ground stake positions around the light fixture. This process ensures the light is properly positioned and the stakes are driven into the ground with appropriate spacing and angles. This detailed approach guarantees a stable and aesthetically pleasing installation.
Optimal Placement Examples
Optimal placement varies based on landscaping designs. For pathways, strategic placement along the edges or within the path maximizes illumination while minimizing obstructions. For gardens, strategically placing lights around plants or trees can highlight specific features or create a captivating ambiance. In a lawn setting, evenly spaced lights along the perimeter or within the lawn can provide comprehensive illumination. Examples of specific designs should be reviewed to understand the nuances of each implementation.
Necessary Tools and Materials
A well-organized checklist of tools and materials is crucial for a smooth and efficient installation process.
| Tool/Material | Description | Quantity |
|---|---|---|
| Solar Panel | The component that converts sunlight into electricity. | 1 |
| Solar Light Fixture | The housing unit contains the light source and solar panel. | 1 |
| Ground Stake | Supports the solar light fixture. | 2 |
| Screws | For securing components to the fixture and ground. | 10 |
Installation Process
The installation process of solar lights involves careful steps to ensure proper functionality and longevity. A methodical approach, following the provided instructions, is crucial for a successful outcome. This section details the step-by-step process, from connecting the solar panel to the fixture to securing the fixture to the ground, along with essential safety precautions.
Connecting the Solar Panel to the Light Fixture
Connecting the solar panel to the light fixture is a straightforward process. Ensure that the correct polarity is observed, as incorrect connections can damage the system. The positive (+) and negative (-) terminals of the solar panel should be connected to the corresponding terminals on the light fixture. Properly crimping the wire connections is essential to avoid loose connections and potential short circuits. A simple and effective method involves using wire strippers to expose the ends of the wires, then using wire connectors to securely connect them.
Positioning the Solar Panel for Optimal Sunlight Exposure
Maximizing sunlight exposure is vital for the solar panel’s efficiency. The solar panel should be positioned facing directly towards the sun, ideally south-facing, to receive the maximum amount of sunlight throughout the day. For locations with limited sunlight, adjustments might be needed to account for the angle of the sun. Consider the position of trees, buildings, or other obstructions that could cast shadows on the solar panel, as these will significantly affect the charging efficiency.
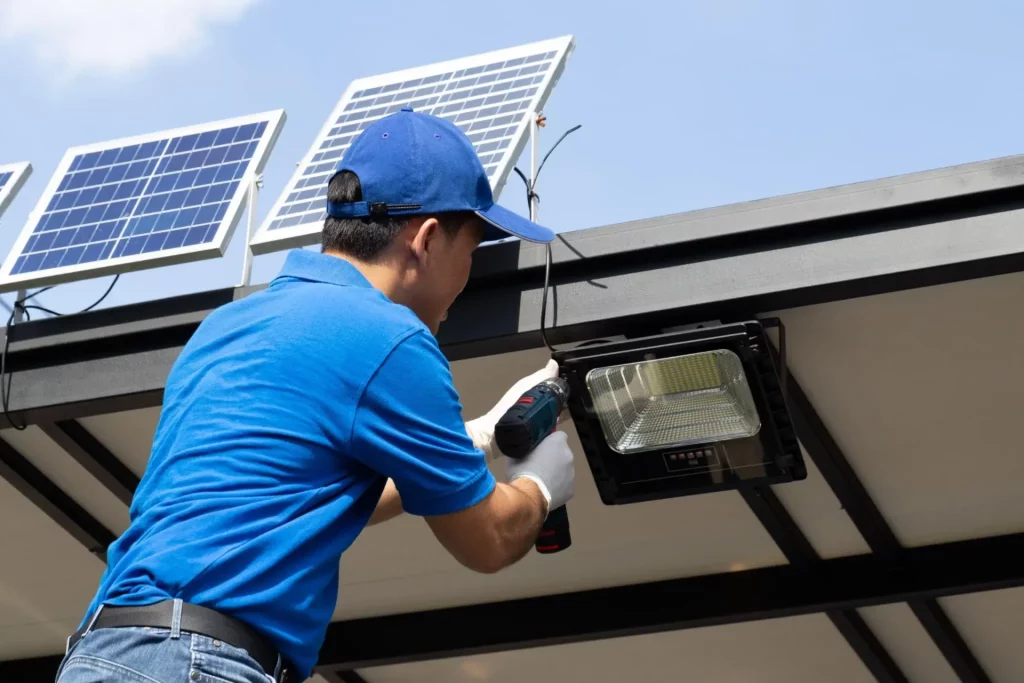
Securing the Light Fixture to the Ground
Properly securing the light fixture to the ground is essential for stability and longevity. Use appropriate anchors and mounting hardware based on the type of ground surface. For instance, concrete or brick surfaces may require different anchoring methods compared to grass or soft soil. Ensure that the mounting hardware is securely fastened and the fixture is firmly attached. Consider using additional supports or weights to increase stability, especially in windy areas. This step is crucial to avoid any potential damage or injury.
Safety Precautions During Installation
Following safety precautions during installation is paramount to prevent accidents and ensure the safe operation of the solar lights.
- Wear appropriate safety gear, including work gloves and safety glasses, to protect yourself from potential injuries. This will prevent cuts, scrapes, and eye injuries during the handling of materials and equipment.
- Ensure the area is clear of obstructions and hazards before beginning installation. This includes removing any loose debris or obstacles to prevent tripping or other mishaps.
- Disconnect the power source to the electrical system if applicable. This prevents electric shocks or other hazards from electrical components during installation.
- Use caution when handling electrical components and wires to prevent short circuits or other electrical hazards. Inspect the wires and connections before energizing the system.
- Check for any underground utilities before digging. This step is essential to prevent damaging any buried lines or pipes. Use a utility locator tool if available.
- If working on a rooftop or elevated surface, ensure proper safety measures are in place, such as fall protection equipment. Never perform work on rooftops or elevated surfaces without proper safety precautions.
Maintenance and Troubleshooting: Installation of Solar Lights
Proper maintenance is crucial for the longevity and optimal performance of your solar lights. Regular upkeep ensures they continue to illuminate your space efficiently and safely while minimizing potential issues. Addressing problems promptly also avoids costly replacements and enhances the overall value of your investment.
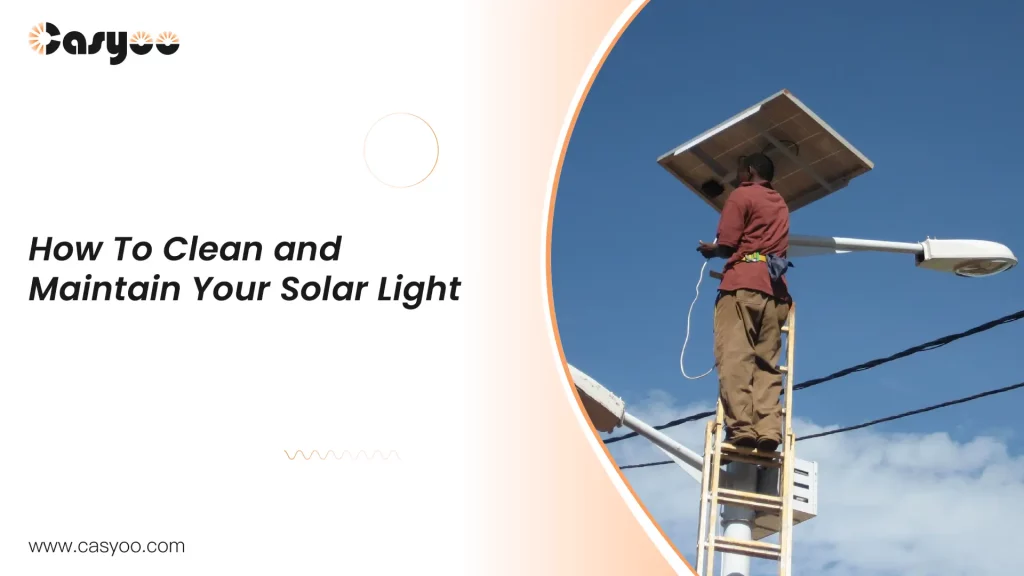
Maintaining solar lights involves a few key steps, focused on the cleanliness of the solar panel and the condition of the battery. Cleaning the solar panel regularly and understanding potential problems are essential for ensuring the lights’ continuous operation and preventing premature failures.
Maintaining Solar Panel Cleanliness
Regular cleaning of the solar panel is vital for optimal energy absorption. Dirt, dust, debris, and even bird droppings can significantly reduce the amount of sunlight converted into electricity. This reduction in energy collection leads to dimmer lights and shorter operating times. Consequently, cleaning the solar panel helps the solar cells function at their peak efficiency.
Common Issues and Solutions
Solar lights, like any electronic device, may experience occasional issues. Understanding common problems and their solutions is key to efficient troubleshooting.
- Dim or no light output:
- Check the solar panel for obstructions or dirt buildup. Cleaning the panel may restore light output.
- Ensure the battery is properly charged. Check the battery level or replace the battery if necessary.
- Inspect the connections for any corrosion or damage. Repair or replace faulty connections.
- Lights flickering or intermittent operation:
- Inspect for any damage to the wiring or connections.
- Check the battery for any issues, such as corrosion or leakage.
- Inspect the solar panel for obstructions or damage.
- Lights not turning on at dusk:
- Verify that the solar panel is exposed to sufficient sunlight. Ensure it’s not shaded by objects.
- Check the battery for sufficient charge. A fully charged battery is essential for operation.
- Check the switch or sensor for proper function. Ensure it’s not damaged.
Troubleshooting Steps
A systematic approach to troubleshooting is important. This helps isolate the source of the problem efficiently.
- Visual inspection:
- Check the solar panel for obstructions or damage. Inspect the connections and wiring for any signs of damage.
- Look for any corrosion or leakage on the battery.
- Confirm the switch or sensor is in the correct position and working properly.
- Battery check:
- Assess the battery charge level. A low battery charge can lead to insufficient light output.
- If the battery is suspected as the issue, consider a battery replacement.
- Solar panel assessment:
- Confirm that the solar panel is exposed to direct sunlight for sufficient charging.
- If necessary, clean the solar panel.
Maintenance Schedule
The frequency of maintenance depends on the type of solar light and its environment. This table provides a general guideline.
| Light Type | Cleaning Frequency | Battery Replacement Frequency |
|---|---|---|
| Path Light | Weekly | Yearly |
| Spotlight | Monthly | Bi-Annually |
Cost and Budget Considerations
Planning a solar lighting project involves careful consideration of upfront costs and long-term savings. Understanding the typical expenses, comparing them to traditional lighting, and anticipating potential savings is crucial for making informed decisions. This section details the financial aspects of implementing a solar lighting system.
Typical Installation Costs
Solar light installations vary in price based on factors such as the number of lights, the type of fixtures, the complexity of the installation site, and labor costs. Generally, the cost per light fixture ranges from $50 to $200, depending on the features and quality. Labor costs can significantly impact the overall project budget and are often quoted per hour or per project.
Upfront Costs vs. Traditional Lighting
Upfront costs for solar lighting are typically higher than those for traditional electric lighting, primarily due to the initial investment in solar panels and other components. However, this initial investment is often offset by the long-term cost savings. A detailed comparison can be illustrated in a table format.
Table: Comparison of Upfront Costs
| Category | Solar Lighting | Traditional Lighting |
|---|---|---|
| Initial Cost (per fixture) | $50-$200 | $10-$50 |
| Installation Labor | $25-$100 per fixture | $10-$25 per fixture |
| Total Upfront Cost (Estimated) | $75-$300 per fixture | $20-$75 per fixture |
Long-Term Cost Savings
Solar lighting systems offer substantial long-term cost savings due to the elimination of electricity bills. The savings are influenced by factors such as electricity rates in the area, usage frequency, and the efficiency of the solar panels. A homeowner in an area with high electricity costs can expect significant savings over the lifetime of the system. For example, a system replacing 10 traditional lights, used daily for 8 hours, can generate substantial savings over 10 years, compared to the electricity cost for those lights.
Solar Light Packages and Costs
Several solar light packages are available, catering to different needs and budgets. These packages typically include a set number of lights, solar panels, and mounting hardware, all pre-configured for ease of installation.
Example Solar Light Packages
- Basic Package: Includes 5 solar lights, basic mounting hardware, and a single small solar panel. Estimated cost: $300-$500. This package is suitable for smaller gardens or walkways.
- Standard Package: Includes 10 solar lights, adjustable mounting hardware, and a larger solar panel. Estimated cost: $600-$1000. This package is suitable for larger yards or areas requiring more illumination.
- Premium Package: Includes 15 solar lights, high-quality weatherproof fixtures, and a high-efficiency solar panel. Estimated cost: $1200-$2000. This package offers a more substantial lighting solution for commercial or large residential applications.
Detailed Breakdown of Project Costs
A complete solar lighting project cost breakdown should include:
- Materials: Cost of solar lights, solar panels, mounting hardware, wiring, and other necessary components.
- Labor: Installation labor costs, including time spent on site preparation, installation, and testing.
- Permitting: Any necessary permits for installation, which may vary by location.
- Contingency: A buffer for unforeseen expenses, like material price increases or unexpected complications during installation.
Environmental Impact
Solar lights offer a significant advantage in the realm of sustainable living, making a positive impact on the environment. By harnessing the power of the sun, these lights reduce reliance on traditional energy sources, lowering greenhouse gas emissions and contributing to a healthier planet. This shift towards renewable energy sources is crucial for mitigating the effects of climate change.
Environmental Benefits of Solar Lights
Solar lights provide a plethora of environmental benefits. Their operation relies entirely on sunlight, a renewable and readily available energy source. This dependence on the sun eliminates the need for fossil fuels, reducing harmful emissions and promoting a cleaner environment. Furthermore, solar light installations require minimal maintenance and produce little to no waste during their lifecycle, minimizing their overall environmental footprint.
Reduction in Carbon Footprint
Traditional lighting systems often rely on electricity generated from fossil fuels, contributing significantly to carbon emissions. Solar lights, on the other hand, produce zero emissions during operation. This shift from non-renewable to renewable energy significantly reduces the carbon footprint associated with lighting. For example, a household replacing all its incandescent bulbs with solar-powered lights can significantly decrease its carbon emissions, contributing to a collective reduction in global warming.
Sustainable Practices in Solar Light Installation
Sustainable practices are inherent in solar light installation. Choosing recycled or recyclable materials for components and optimizing installation methods to minimize disruption to natural habitats are important aspects. Proper disposal of components at the end of the light’s lifespan is also crucial. By adopting these practices, the environmental impact of the entire process is minimized. For instance, many manufacturers are incorporating recycled plastic into the construction of solar panels, demonstrating a commitment to sustainability.
Comparison of Environmental Impact
| Feature | Solar Lights | Traditional Lights |
|---|---|---|
| Energy Source | Renewable (Sunlight) | Non-Renewable (Fossil Fuels) |
| Carbon Footprint | Low | High |
| Waste Production | Minimal (Mostly recyclable components) | Significant (Discarded bulbs, manufacturing waste) |
This table clearly illustrates the stark difference in environmental impact between solar and traditional lighting. Solar lights represent a more sustainable choice, reducing reliance on finite resources and lowering emissions.
Aesthetic Considerations
Choosing solar lights that seamlessly integrate with your landscape’s design is crucial for a visually appealing and harmonious outdoor space. Proper selection enhances the overall aesthetic, transforming your yard into a captivating environment. The right choice of style, color, and placement can elevate the beauty of your property.
Integrating solar lights effectively into your landscape design goes beyond simple illumination. Careful consideration of style, color, and placement is paramount to achieving a cohesive and visually appealing outcome. This involves understanding how the lights interact with existing features and creating a balanced, aesthetically pleasing lighting scheme.
Selecting Solar Light Styles
Different solar light styles offer various aesthetic appeals. Understanding these differences allows for informed choices that complement the overall design. Styles range from classic to contemporary, each contributing a unique visual element to the landscape.
- Contemporary Styles: Sleek, modern designs often feature minimalist shapes and clean lines, ideal for contemporary or modern landscaping. These lights tend to have a more understated elegance, focusing on functionality and form. Examples include solar spotlights with a streamlined profile or solar path lights with geometric shapes.
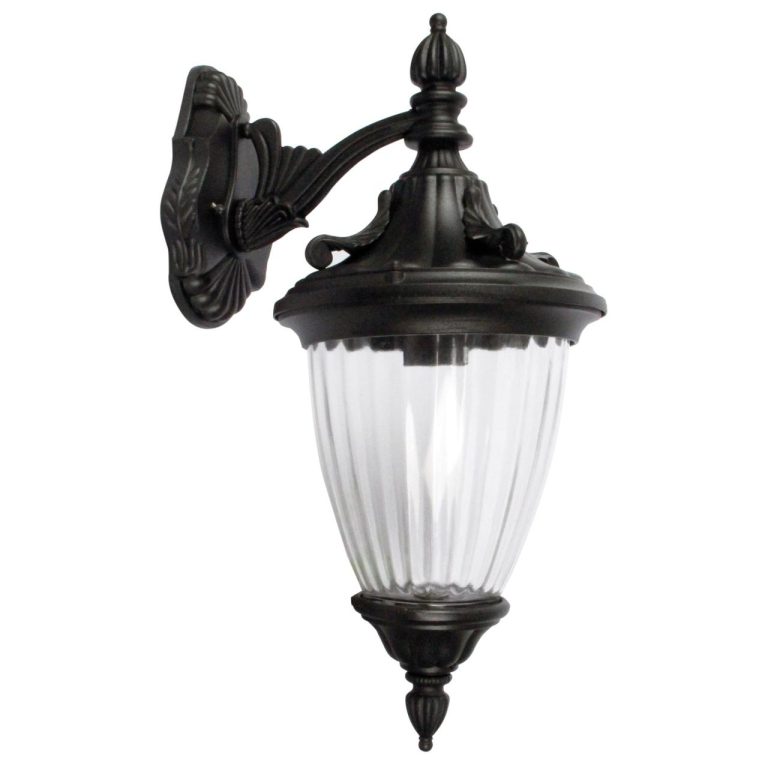
- Traditional Styles: These often evoke a classic, timeless appeal. They frequently feature ornate or decorative designs, adding a touch of historical charm. Examples include solar lanterns with intricate detailing or solar post caps that mimic traditional architectural elements.
- Rustic Styles: These solar lights are crafted with natural materials or textures, such as weathered wood or stone, to complement rustic or natural landscapes. They often have a warm, inviting glow, suitable for gardens with natural elements.
Coordinating Solar Lights with Outdoor Features
A well-planned lighting scheme considers the interplay between solar lights and existing outdoor features. Integrating lights with architectural elements, walkways, and landscaping creates a cohesive aesthetic.
- Architectural Elements: Solar spotlights can highlight architectural details such as columns, doorways, or decorative features. Choosing lights that complement the style of the building and landscaping will create a cohesive aesthetic. For example, a traditional home might benefit from solar lanterns that echo the design elements of the house, whereas a modern home would benefit from sleek, contemporary solar spotlights.
- Walkways and Paths: Solar path lights provide safe and visually appealing illumination along walkways and pathways. The placement and spacing of these lights should be carefully considered to avoid creating uneven or overly bright spots. Consider the natural flow of the path when determining the best placement for the lights. The brightness of the lights should be adjusted to avoid glare while ensuring adequate visibility. A path lined with solar lights can enhance the ambiance of the walkway.
- Landscaping Elements: Solar spotlights can highlight trees, shrubs, or other landscaping features. For instance, strategically placed solar spotlights can draw attention to the foliage of a beautifully landscaped garden or the intricate details of a meticulously pruned hedge.
Choosing Solar Light Colors and Brightness
Solar light colors and brightness levels play a significant role in creating the desired ambiance. Different colors and brightness levels can be used for different purposes and to set a specific mood.
- Color Temperature: Warm white solar lights emit a yellowish glow, creating a cozy and inviting atmosphere. Cool white lights provide a brighter, more neutral illumination. Consider the overall color scheme of your landscape and the mood you wish to create when choosing a color temperature. Warm white lights might be better suited for a romantic ambiance, while cool white lights might be more appropriate for a contemporary setting.
- Brightness Levels: Adjusting the brightness of solar lights is crucial for achieving the desired level of illumination. Consider the specific area being lit and the level of visibility needed. For example, walkways might require brighter lights than areas where ambient light is sufficient. Different brightness levels can highlight different elements of the landscape or create a specific mood.
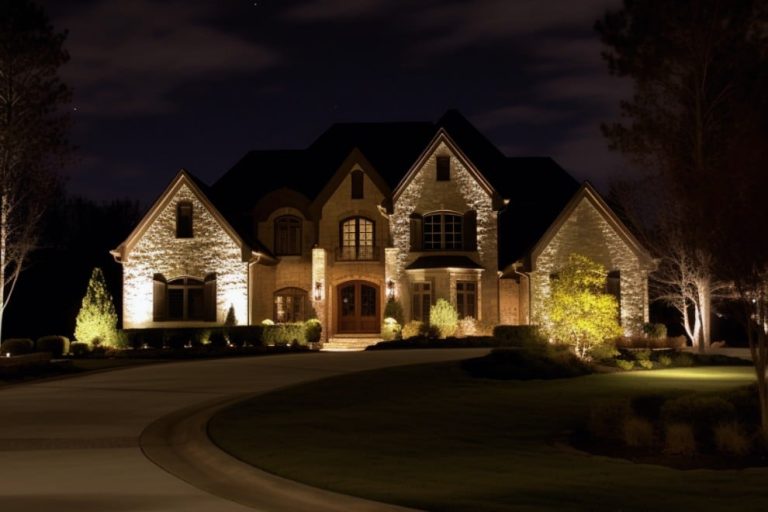
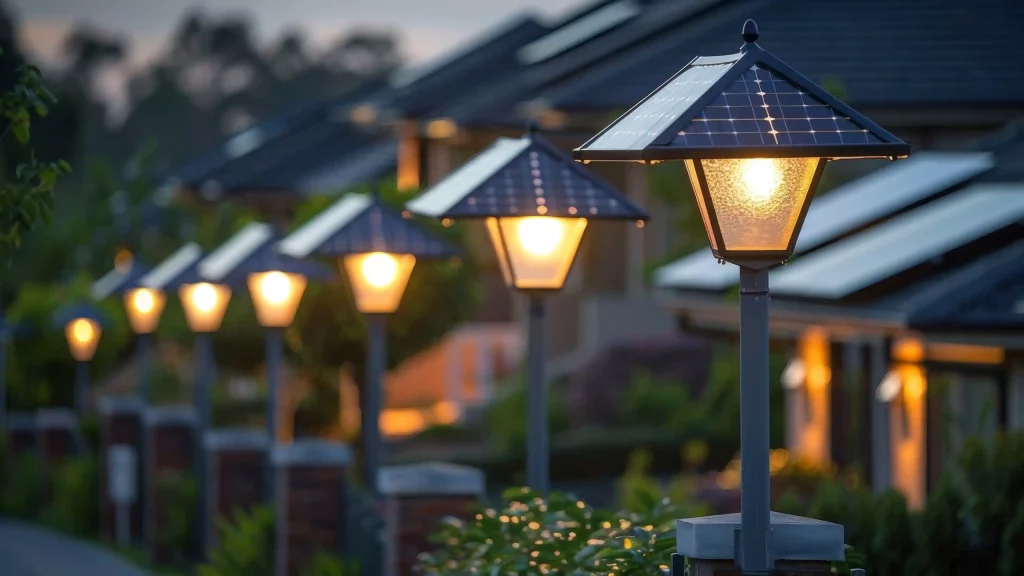
Gallery of Inspiring Solar Lighting Installations
Visual inspiration can be crucial in achieving the desired aesthetic. Viewing examples of successful installations allows for creative problem-solving and the implementation of effective design strategies. Consider the use of different light styles, colors, and placements to inspire your own unique approach.
Examples of successful installations often incorporate a combination of different solar light styles, colors, and placements to create a visually appealing and functional lighting scheme. A well-designed installation harmonizes the lights with the existing landscape elements.
Ending Remarks
In conclusion, installing solar lights offers a practical and aesthetically pleasing solution for outdoor illumination. By carefully considering factors like placement, light type, and maintenance, you can enjoy beautiful, energy-efficient lighting that enhances your property while reducing your environmental footprint. This guide provides a comprehensive overview of the entire process, from planning to post-installation care, empowering you to create a stunning and sustainable outdoor space.