Blink Floodlight Camera Setup Your Home Security Guide
Blink floodlight camera setup is your key to a smarter, more secure home. These cameras offer a compelling blend of security and convenience, combining powerful illumination with advanced features. This guide will walk you through every step, from initial setup to advanced configurations, ensuring you get the most out of your Blink floodlight system.
We’ll cover everything from connecting the cameras to your home network to setting up motion detection and customizing notification settings. You’ll learn how to optimize light placement for maximum coverage, troubleshoot issues, and even integrate your Blink system with other smart home devices for a seamless experience. Get ready to enhance your home security with ease!
Introduction to Blink Floodlight Camera Setup
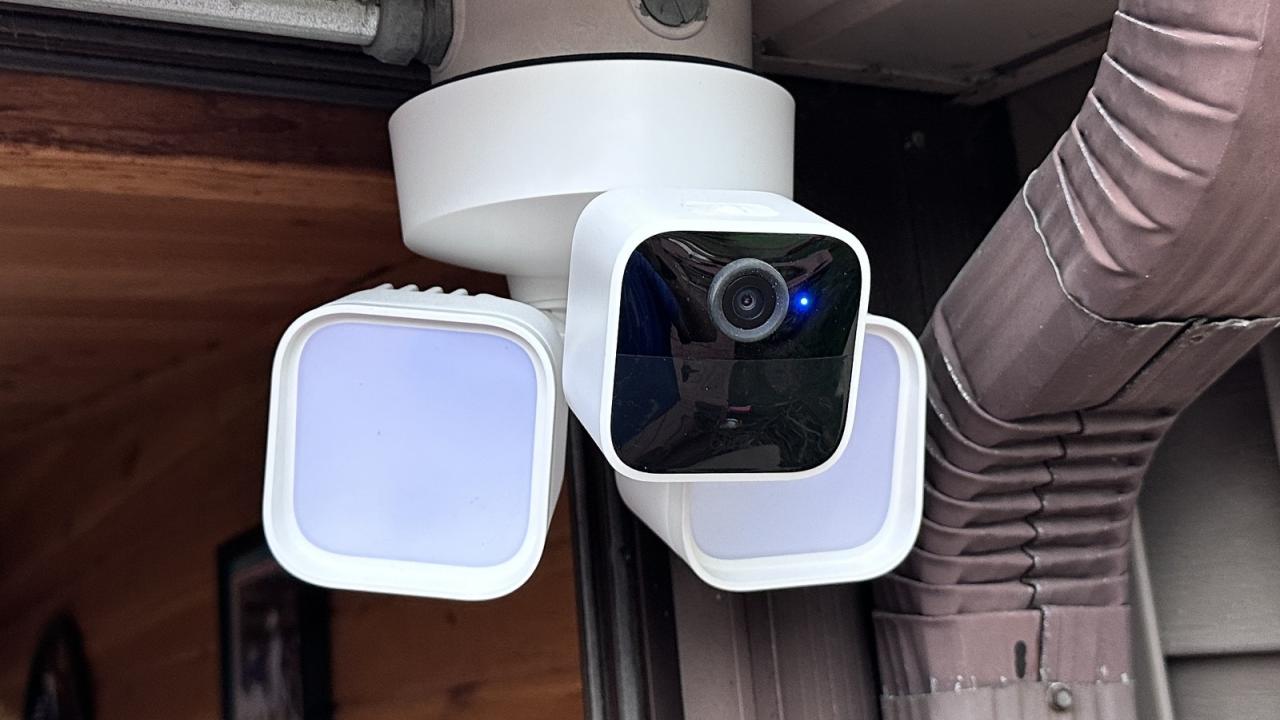
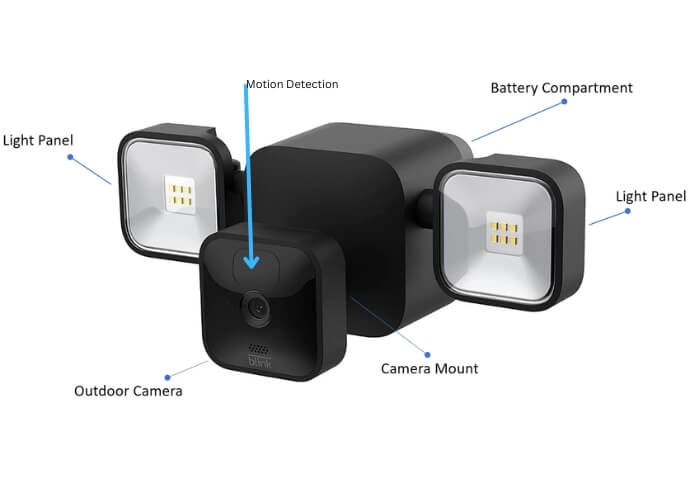
Blink floodlight cameras are a popular choice for home security, offering a blend of video surveillance and powerful illumination. These smart cameras provide real-time monitoring and enhanced visibility in areas that need it most, often in conjunction with motion-activated lighting. They are designed for easy installation and integration with existing home security systems and smartphone apps for remote control.
These cameras represent a significant advancement in home security, offering a more comprehensive solution than traditional security systems, especially for outdoor spaces. They combine the functionality of a security camera with the practicality of a floodlight, which improves visibility and deterrence, reducing the likelihood of criminal activity. They are also particularly well-suited for homeowners seeking a cost-effective solution that doesn’t compromise on security and convenience.
Blink Floodlight Camera Functionalities
Blink floodlight cameras provide a comprehensive security solution by combining high-resolution video recording with powerful LED floodlights. Their motion-sensing capabilities trigger the lights and recording when movement is detected, enhancing visibility and deterring potential intruders. This dual functionality is a key differentiator from traditional security cameras or standalone floodlights.
Benefits of Using Blink Floodlight Cameras
Blink floodlight cameras offer several key advantages over other security solutions. They combine the benefits of traditional floodlights with the convenience of modern security cameras, providing enhanced visibility and deterrents. Their streamlined installation process, intuitive smartphone app, and robust cloud storage features make them user-friendly and reliable. Furthermore, their affordability makes them a compelling choice for homeowners looking to bolster their security without a significant investment.
History and Evolution of Blink Floodlight Camera Technology
Blink floodlight cameras are part of a broader trend in home security technology. Early home security systems relied on separate, less integrated solutions. The evolution of smart technology has led to the development of more sophisticated and user-friendly systems. Blink’s innovation lies in the combination of security camera functionality with high-intensity illumination, making them a more effective and versatile security tool.
Step-by-Step Initial Camera Setup Guide
The installation process is straightforward and typically involves these steps:
- Download and install the Blink app on your smartphone.
- Connect the camera to your home Wi-Fi network.
- Adjust the camera’s mounting position for optimal visibility.
- Configure motion detection zones and other settings within the app.
- Test the camera’s functionality and lighting system.
These steps ensure a smooth installation process, enabling you to quickly get the most out of your Blink floodlight camera.
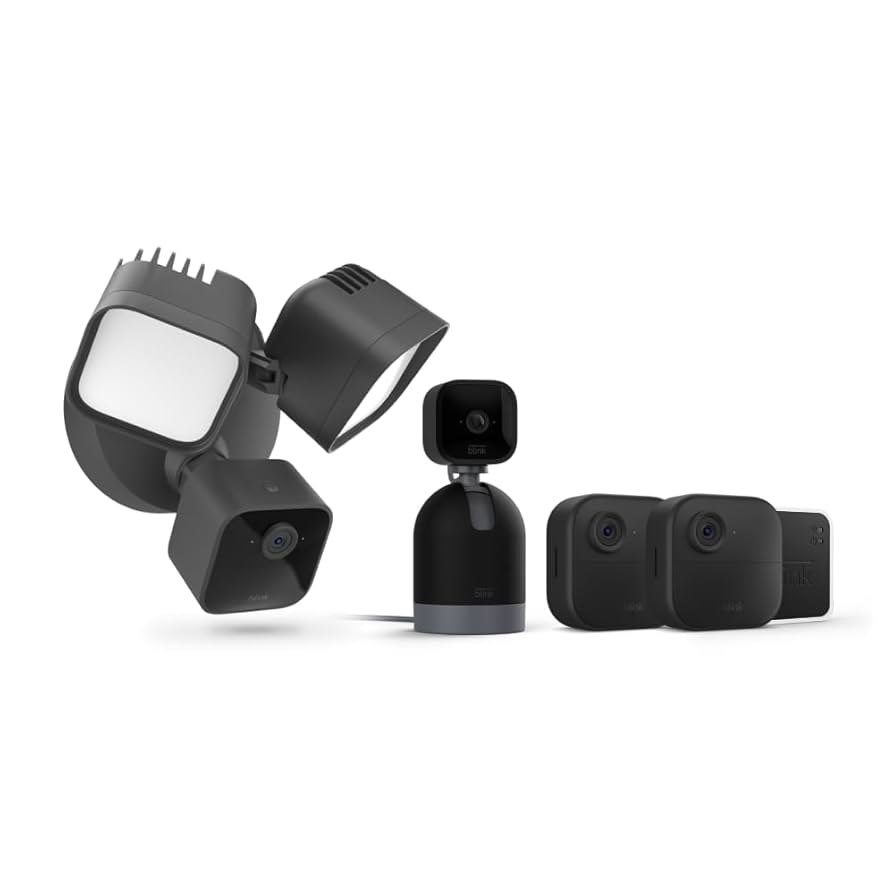
Comparison of Different Blink Floodlight Camera Models
The following table lists the key features and specifications for different Blink floodlight camera models. This comparison highlights the diverse options available to meet varying security needs and budgets.
| Model | Key Features | Resolution | Lighting | Price |
|---|---|---|---|---|
| Blink Floodlight Cam (First Gen) | Basic motion detection, LED floodlights | 1080p | 1000 lumens | $199 |
| Blink Floodlight Cam (Second Gen) | Improved motion detection, 2-way audio | 1080p | 1200 lumens | $249 |
| Blink Floodlight Cam (Third Gen) | Enhanced night vision, more advanced motion detection | 1080p | 1400 lumens | $299 |
These models cater to a range of preferences, from basic security to more advanced features. Choosing the right model depends on individual security needs and budget considerations.
Connecting the Cameras
Connecting your Blink Floodlight Cameras to your home network is crucial for seamless operation. A stable connection ensures real-time monitoring, notifications, and recording functionality. This section details the process, covering various connection methods and troubleshooting potential issues.
Connecting the cameras to your home network is a straightforward process, similar to connecting most wireless devices. Different connection methods offer varying levels of reliability and convenience.
Wi-Fi Connection
A Wi-Fi connection is the most common and convenient method for connecting Blink Floodlight Cameras. This method leverages your existing home Wi-Fi network for a wireless connection. Ensure your router is configured properly and that the signal strength is adequate throughout your home. A poor Wi-Fi signal can lead to intermittent connectivity and reduced performance.
Ethernet Connection
An Ethernet connection offers a more stable and reliable alternative to Wi-Fi. This method uses a physical cable to connect the camera directly to your router. An Ethernet connection is less susceptible to interference from other devices or obstacles. This method is particularly useful for environments with complex Wi-Fi interference or for those seeking the most stable connection. Using a wired connection ensures consistent performance, especially during peak network usage times.
Importance of a Stable Internet Connection
A stable internet connection is paramount for optimal Blink Floodlight Camera performance. Buffering, delays, and missed events can occur if your internet speed is insufficient. Consider your internet plan’s bandwidth and latency. If your internet service provider (ISP) is experiencing outages or your network is congested, you may experience connectivity problems. Regular internet maintenance and upgrades are crucial for preventing disruptions. For example, upgrading to a faster internet plan can significantly improve camera performance, particularly in homes with multiple devices actively using the network.
Network Configuration Issues
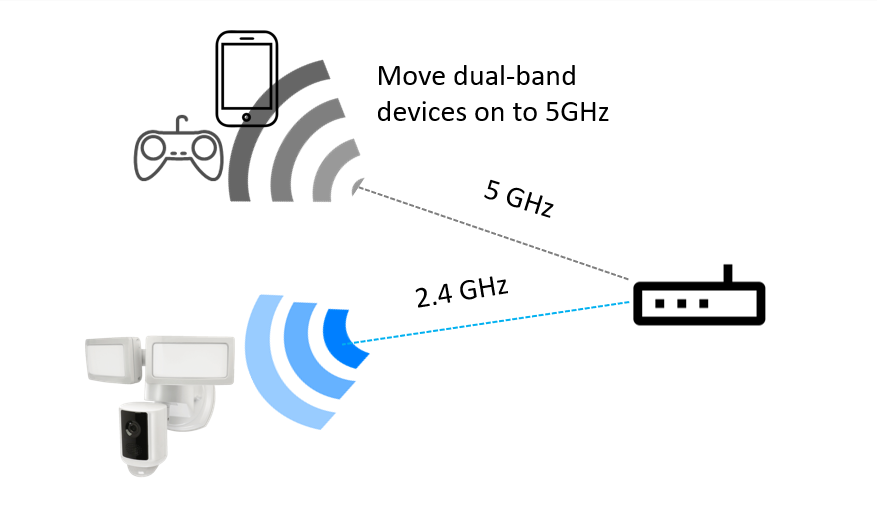
Incorrect network settings can lead to connectivity problems. Incorrect Wi-Fi passwords, SSID names, or security protocols can prevent the camera from connecting to your network. Ensure the camera’s Wi-Fi settings match your router’s settings. Check your router’s configuration page for details about your network’s name and password. Furthermore, ensure the camera is set to the correct network mode (2.4GHz or 5GHz). Consider using a more recent firmware update for your camera, as this can resolve compatibility issues.
Troubleshooting Connectivity Problems
If you encounter connectivity problems, follow these steps:
- Restart your router and camera. A simple restart can often resolve temporary network glitches.
- Check the Wi-Fi signal strength at the camera’s location. If the signal is weak, consider moving the camera closer to the router or using a Wi-Fi extender.
- Verify that the correct Wi-Fi password and SSID are entered in the camera’s settings.
- Ensure that no other devices are interfering with the camera’s Wi-Fi connection.
- Contact your internet service provider (ISP) if you suspect an internet outage.
Example Network Configuration Issue incorrect Wi-Fi password or an outdated router firmware can prevent the camera from connecting to the network. To resolve this, verify the accuracy of the Wi-Fi password entered in the camera’s settings and consider updating your router’s firmware to the latest version.
Setting Up the Floodlights: Blink Floodlight Camera Setup
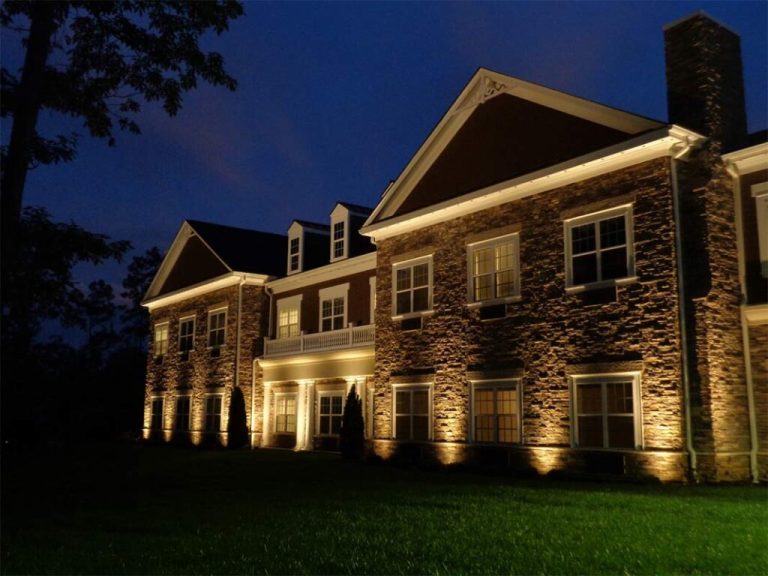
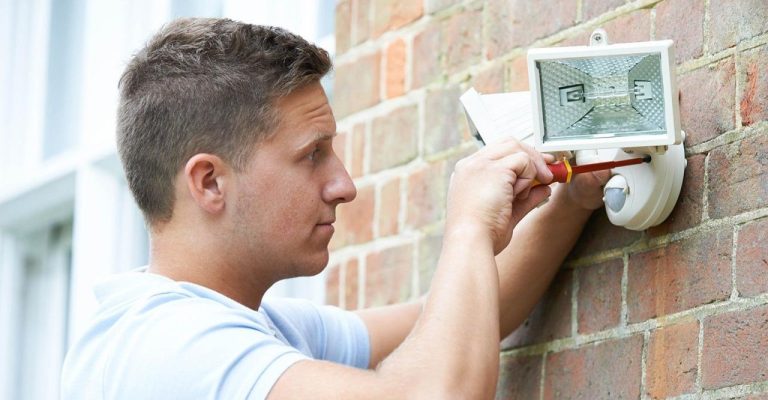
Properly positioning and mounting your Blink floodlight cameras’ floodlights is crucial for optimal performance. Careful consideration of mounting locations, light angles, and the surrounding environment will maximize the camera’s surveillance capabilities. The floodlights are not merely decorative elements; they are essential components of your security system, providing a wider field of view and deterring potential intruders.
Effective floodlight placement extends beyond simply mounting them; it involves strategic aiming and positioning to achieve maximum coverage. The specific mounting locations and adjustments directly impact the camera’s overall effectiveness. By considering factors like the surrounding landscape and desired visibility, you can enhance your security system’s reliability and responsiveness.
Mounting and Positioning for Optimal Coverage
Effective floodlight placement is key to maximizing the camera’s surveillance area. The positioning of the floodlights should ensure they adequately illuminate the intended areas, providing comprehensive coverage while minimizing blind spots. This often requires careful consideration of the terrain, architecture, and surrounding environment.
Light Placement and Aiming Best Practices
Optimal light placement is crucial for clear visibility and reduced glare. Ensure the floodlights are aimed at the areas you want to monitor, avoiding excessive light spillage or glare that might impact the camera’s image quality. This includes considering the height and direction of the floodlights to maximize the coverage area. For instance, aiming the floodlights slightly downward can illuminate a larger ground area.
Importance of Lighting Angles and Range
Lighting angles and the range of illumination are critical factors in surveillance. The ideal angle should effectively cover the desired area without casting unnecessary shadows. A wide range of illumination allows the camera to capture clear images of a larger area. A narrow angle of illumination may result in limited coverage and potential blind spots. The relationship between the angle of the floodlight and its range dictates the amount of area the light covers. For instance, a floodlight positioned at a higher angle will have a broader range than one positioned lower.
Factors Affecting Light Range and Visibility
Several factors can influence the effective range and visibility of the floodlights. Obstructions like trees, buildings, or other structures can significantly impact the range and visibility. The type of light and the weather conditions also play a significant role. For example, heavy fog or rain can greatly reduce visibility, while a brighter light source will improve the range of visibility. The color temperature of the light and the material of the walls, roofs, or objects within the surveillance area will also affect visibility.
Mounting Options for Different Surfaces
The following table shows Artikels’ mounting options for different wall and ceiling types, ensuring a secure and stable installation:
| Wall/Ceiling Type | Mounting Option | Considerations |
|---|---|---|
| Drywall | Mounting bracket with screws | Use appropriate screws for drywall. |
| Concrete | Mounting bracket with anchors | Use appropriate anchors for concrete. |
| Plaster | Mounting bracket with screws | Ensure proper screw length and use appropriate sealant. |
| Metal | Mounting bracket with screws | Use appropriate screws for metal. |
Configuring the App and System Settings
The Blink app provides a user-friendly interface for managing your floodlight cameras and associated settings. Proper configuration ensures optimal performance, security, and personalized monitoring. This section details the app’s features and configuration options for efficient camera management.
Blink App Interface and Navigation
The Blink app boasts a clean and intuitive design, facilitating seamless navigation. Users can easily access and manage various settings related to their cameras. The main screen displays a list of all connected cameras, allowing quick access to individual camera views and controls. Subsequent screens provide detailed controls for each camera, including real-time viewing, recording settings, and motion detection.
Setting Up User Accounts and Permissions
Establishing user accounts and defining appropriate permissions within the Blink app is crucial for maintaining security and access control. The app allows administrators to create different user accounts with varying levels of access. This ensures only authorized personnel can adjust critical settings or view recordings. For example, a parent might create a separate account for a child to monitor the front door while restricting access to other camera feeds.
Configuring Motion Detection Zones and Sensitivity Levels
Defining motion detection zones and sensitivity levels is essential for customized camera alerts. This allows the system to trigger alerts only for specific areas of interest, reducing false alarms. The app enables users to delineate specific areas within the camera’s field of view where motion is monitored. Adjusting sensitivity levels allows users to fine-tune the camera’s responsiveness to motion, balancing between avoiding missed events and reducing unnecessary notifications. For instance, a user might designate a specific zone around a doorway for enhanced monitoring while maintaining a lower sensitivity level for the rest of the property.
Customizing Recording Settings
The Blink app permits the customization of recording settings, such as video resolution and storage. Higher resolutions capture more detail but require more storage space. The app offers different resolution options to suit individual needs and storage capacity. Additionally, the app allows users to choose between various storage options, enabling efficient storage management. Users can decide whether to save recordings indefinitely or retain them for a set duration. For example, choosing a lower resolution might be appropriate for general monitoring, while a higher resolution is suitable for critical areas like entrances.
Customizing Notification Settings
Customizing notification settings enables users to tailor alerts to their preferences. Users can configure the types of events that trigger notifications, such as motion detection, sound detection, or even specific timeframes. Users can also specify the notification channels they wish to receive alerts on, such as email, push notifications, or SMS messages. For instance, a user might receive notifications only during specific hours or for motion detected within a particular zone, reducing the number of unnecessary alerts.
Advanced Features and Customization
Once your Blink Floodlight Cameras are set up, you can further enhance their functionality with a variety of advanced features. These options allow you to personalize the camera’s sensitivity and responsiveness, ensuring optimal security and control.
The following sections provide detailed information on night vision, two-factor authentication, motion detection, live feed, recording options, and common troubleshooting steps for the Blink app.
Night Vision
Blink Floodlight Cameras offer superior night vision, crucial for clear visibility in low-light conditions. This feature significantly enhances the camera’s performance in the dark, making it highly effective for deterring intruders and monitoring your property at night. The technology used in night vision varies based on the specific camera model.
Two-Factor Authentication
Two-factor authentication adds an extra layer of security to your Blink account. This enhances the protection of your account from unauthorized access by requiring a second verification method beyond your password. Enabling this security measure is highly recommended for maintaining the privacy and security of your account.
- To enable two-factor authentication, access your Blink account settings and navigate to the security section. Follow the on-screen instructions to set up a recovery code or mobile authenticator app.
Motion Detection Alerts
Motion detection alerts are a fundamental aspect of the Blink Floodlight Cameras, allowing you to receive real-time notifications when movement is detected in the monitored area. This feature is vital for providing immediate alerts in case of potential threats.
- To configure motion detection alerts, access the Blink app and navigate to the camera settings for the relevant camera. Adjust the sensitivity and area covered by the motion detection zone to prevent false alarms. Configure the notification preferences, such as which devices you want to receive the alerts on.
Viewing Live Feeds and Recordings
Viewing live feeds and recordings is a crucial part of monitoring your property. The Blink app provides several methods for accessing and reviewing this information. Live feed allows you to monitor your property in real time. Recordings allow you to review events that occurred in the past.
- Live feeds can be accessed directly from the Blink app by selecting the desired camera. You can also schedule recordings for specific periods or activate continuous recording.
- Reviewing recordings is possible by navigating to the camera’s recording history within the Blink app. You can search and filter recordings by date and time.
Troubleshooting the Blink App
The Blink app, while generally reliable, may encounter occasional issues. This section provides solutions for common problems.
| Problem | Solution |
|---|---|
| App crashes frequently | Ensure your device has sufficient storage space and is running the latest version of the Blink app. Try restarting your device or clearing the app’s cache. |
| Camera connection issues | Check your Wi-Fi connection and ensure the camera is within the range of your router. Restart both the camera and your router. Try a different Wi-Fi network if possible. |
| Missing notifications | Verify your device’s notification settings are enabled for the Blink app. Check your device’s battery level, as lowta he battery can sometimes affect notifications. |
Integration with Other Smart Home Devices
Blink floodlight cameras, while offering robust security features, gain enhanced functionality through integration with other smart home platforms. This integration allows users to seamlessly control and monitor their security system alongside other smart home devices, creating a more interconnected and automated environment. This expanded functionality streamlines home automation and provides a comprehensive approach to home security and convenience.
Integration with Smart Home Ecosystems, Blink floodlight camera setup
Blink cameras are designed to integrate with popular smart home ecosystems, such as Amazon Alexa and Google Assistant. This allows users to control the floodlight cameras and their functions through voice commands. This integration also extends to other compatible smart home devices, enabling a unified control system for the entire home. These integrations leverage existing smart home infrastructures for a more comprehensive user experience.
Connecting Blink Cameras with Smart Assistants
Integrating Blink floodlight cameras with smart assistants like Amazon Alexa or Google Assistant requires a few simple steps. First, ensure the Blink app and the smart assistant are both updated to the latest versions. Next, add the Blink camera as a device within the smart assistant’s app. This step typically involves linking the Blink account with the smart assistant’s account. Finally, verify the connection by testing the voice commands to control the camera functions.
Controlling Lights from Other Devices
Controlling the floodlight cameras from other compatible smart home devices often involves using the Blink app as an intermediary. The Blink app allows for remote control of the floodlight camera functions. This includes features such as switching the lights on or off, adjusting the brightness, or activating motion detection alerts. This control mechanism is often standardized across compatible smart home devices.
Compatibility with Different Smart Home Systems
The table below details the compatibility of Blink floodlight cameras with various smart home ecosystems.
| Smart Home System | Compatibility |
|---|---|
| Amazon Alexa | Yes |
| Google Assistant | Yes |
| Apple HomeKit | Yes |
| SmartThings | Yes |
| IFTTT | Yes |
| Samsung SmartThings | Yes |
| Other Platforms | Limited or No Direct Support; may be accessible through IFTTT or other workarounds |
Troubleshooting and Maintenance
Keeping your Blink Floodlight Camera system running smoothly involves addressing potential issues and performing regular maintenance. This section details common problems, their solutions, and essential maintenance steps to ensure optimal performance.
Troubleshooting common issues can save time and frustration. Knowing how to identify and resolve problems quickly can significantly impact your overall experience with the system.
Common Setup Issues and Resolutions
Troubleshooting setup problems is crucial for a seamless experience. Below are some typical issues and their resolutions.
- Camera not connecting to Wi-Fi: Ensure the camera is within range of your Wi-Fi router. Check for obstructions like walls or other electronic devices that might interfere with the signal. Restart your router and the camera. If the problem persists, try a different Wi-Fi network or contact Blink support for further assistance.
- Floodlight not working: Verify the floodlight is properly connected to the camera. Check the power supply and ensure it is functioning correctly. If the floodlight still isn’t working, contact Blink support for assistance.
- App connection issues: Ensure the Blink app is updated to the latest version. Restart your mobile device. Check your internet connection. If the issue persists, contact Blink support.
Network Connection Troubleshooting
A stable network connection is essential for the Blink system to function properly. Following these steps can help resolve network-related issues.
- Verify Wi-Fi Signal Strength: Ensure the camera is positioned close to your Wi-Fi router and that there are no significant obstructions. Using a Wi-Fi analyzer app can help identify weak signal areas.
- Check Router Settings: Confirm your router’s settings allow for the camera’s connection. Ensure the correct Wi-Fi network and password are entered in the camera’s settings.
- Restart Devices: Restart both your router and the camera to resolve temporary connection glitches.
- Troubleshoot Network Conflicts: Identify and resolve any network conflicts that might be impacting the camera’s connection. Ensure other devices on your network aren’t consuming excessive bandwidth.
Factory Reset Procedure
Knowing how to reset the camera to factory settings can resolve various issues.
- Locate Reset Button: Refer to your camera’s user manual for the specific location of the reset button. The reset button may be hidden behind a small cover.
- Press and Hold: Press and hold the reset button for the specified duration, typically 10 seconds. The camera will display a reset confirmation message. Follow the on-screen prompts.
- Reconnect to Network: Once the reset is complete, reconnect the camera to your Wi-Fi network following the instructions in the app.
Handling Damaged or Malfunctioning Components
Addressing damaged components is vital for maintaining system functionality.
- Identify the Problem: Carefully assess the damage or malfunction. Note any visible signs of damage, such as cracks, dents, or broken parts.
- Contact Blink Support: For damaged or malfunctioning components, immediately contact Blink support. They can provide guidance on replacement options or troubleshooting steps.
- Replace Components: Follow Blink’s instructions for replacing damaged or malfunctioning components. Use only genuine Blink parts for optimal performance and safety.
Regular Maintenance Tasks
Regular maintenance extends the lifespan of your Blink Floodlight Camera system.
- Cleaning the Camera: Regularly clean the camera lens to remove dust or debris that may obstruct the camera’s view. Use a soft, lint-free cloth.
- Checking Battery Levels: Periodically check the battery levels of the camera and floodlight. Replace batteries as needed to ensure consistent operation.
- Inspecting for Damage: Visually inspect the camera and floodlight for any signs of damage, such as cracks, dents, or corrosion.
Security Considerations and Privacy

Source: slashgear.com
Protecting your Blink floodlight camera system is crucial for maintaining peace of mind and ensuring the privacy of those within your monitored area. Proper security measures can prevent unauthorized access and misuse of the recorded footage. This section details essential security precautions to bolster your system’s resilience against potential threats.
Robust security measures are paramount when utilizing surveillance systems. Implementing strong passwords, secure networks, and diligent privacy settings is critical to safeguard your system and personal data. These steps will minimize risks and enhance the overall security of your Blink system.
Strong Passwords and Secure Networks
Strong passwords and secure networks form the foundation of any robust security system. Weak passwords are easily cracked, and unsecured networks expose your cameras to potential intrusions.
Using a unique, complex password for your Blink account and router is essential. Avoid easily guessable passwords like common names, dates, or simple sequences. Employ a combination of uppercase and lowercase letters, numbers, and symbols. Utilizing a password manager can aid in creating and storing complex passwords securely. Regular password changes further enhance security.
For your network, use strong encryption protocols, such as WPA2 or WPA3. Avoid using open or default network names and passwords. Consider using a virtual private network (VPN) to encrypt your network traffic, further bolstering security. This adds an extra layer of protection for your camera system, especially if using a public Wi-Fi network.
Privacy Settings Configuration
Proper configuration of privacy settings is vital for controlling the use and sharing of recorded footage. These settings allow you to restrict access and control what data is collected and stored.
The Blink app provides various privacy settings. You can adjust the recording schedule to limit when recordings occur, ensuring that recordings are only made when needed. Configure the camera’s view to restrict the area it monitors. Review and adjust sharing permissions, limiting who can access the recorded footage.
Preventing Unauthorized Access
Unauthorized access can compromise your privacy and security. Implementing measures to deter unauthorized access is crucial.
Disable remote access if not needed. Use strong network security measures to prevent outsiders from accessing your network. Consider using network firewalls and intrusion detection systems to further enhance security. Regularly review your system’s security logs for any unusual activity.
Security Protocols
Several security protocols enhance the security of your Blink floodlight camera system. Utilizing these protocols can mitigate risks and protect your system.
Utilizing two-factor authentication (2FA) adds an extra layer of security. This method requires a secondary verification method, such as a code sent to your phone, to confirm login attempts. Consider using encryption protocols for data transmission, ensuring that data exchanged between your cameras and the app is protected from interception.
Implementing these measures, including strong passwords, secure networks, configured privacy settings, prevention of unauthorized access, and the use of various security protocols, is critical to ensure the safety and privacy of your Blink floodlight camera system.
Closing Summary
In conclusion, setting up your Blink floodlight cameras is a straightforward process, made even easier with this comprehensive guide. We’ve explored every aspect, from initial connection to advanced customization, helping you transform your home into a well-protected and intelligent space. From connecting to your network to leveraging smart home integrations, this guide empowers you to confidently manage your security system. By following these steps, you can optimize your home security and enjoy the peace of mind that comes with a properly configured Blink system.